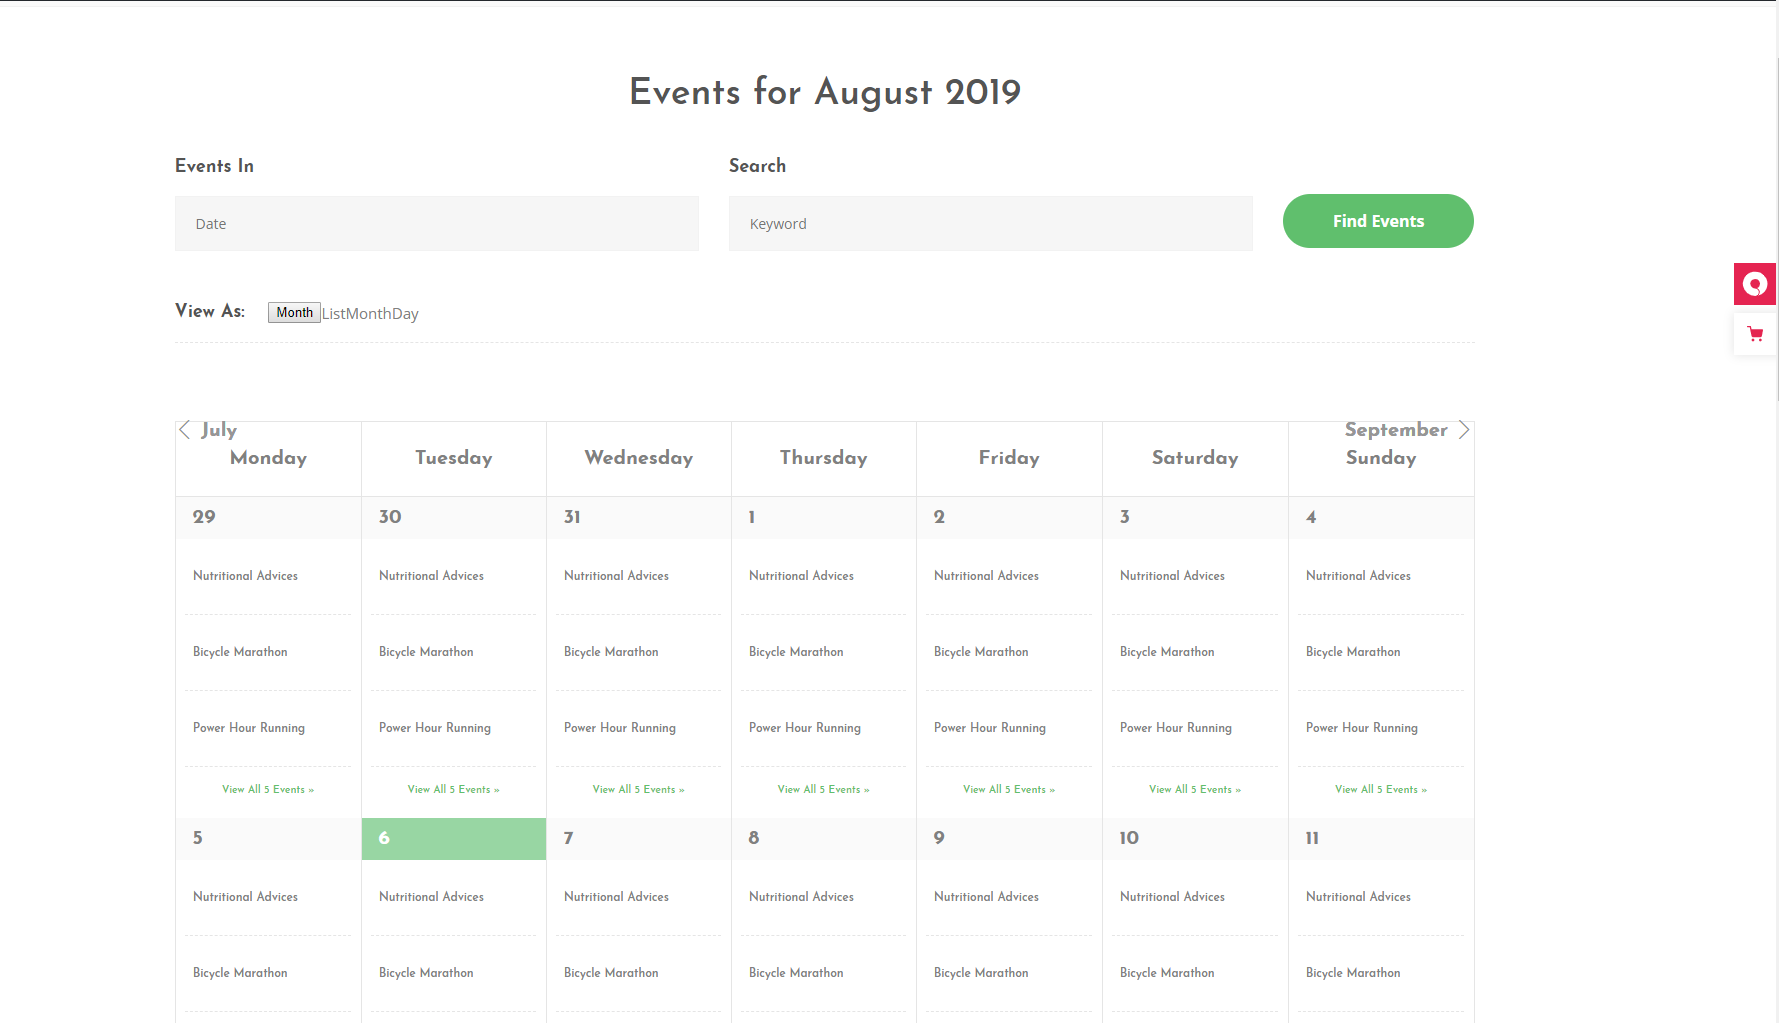
To display events, our themes rely on The Events Calendar plugin.
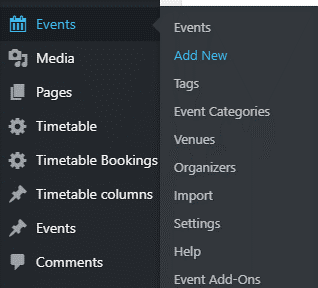
After you’ve installed and activated The Events Calendar plugin, you’ll be able to create events with ease. You’ll notice a new option named Events in your dashboard, and when you hover over it you’ll see the Add New option.
You should click this option in order to create a new Event:
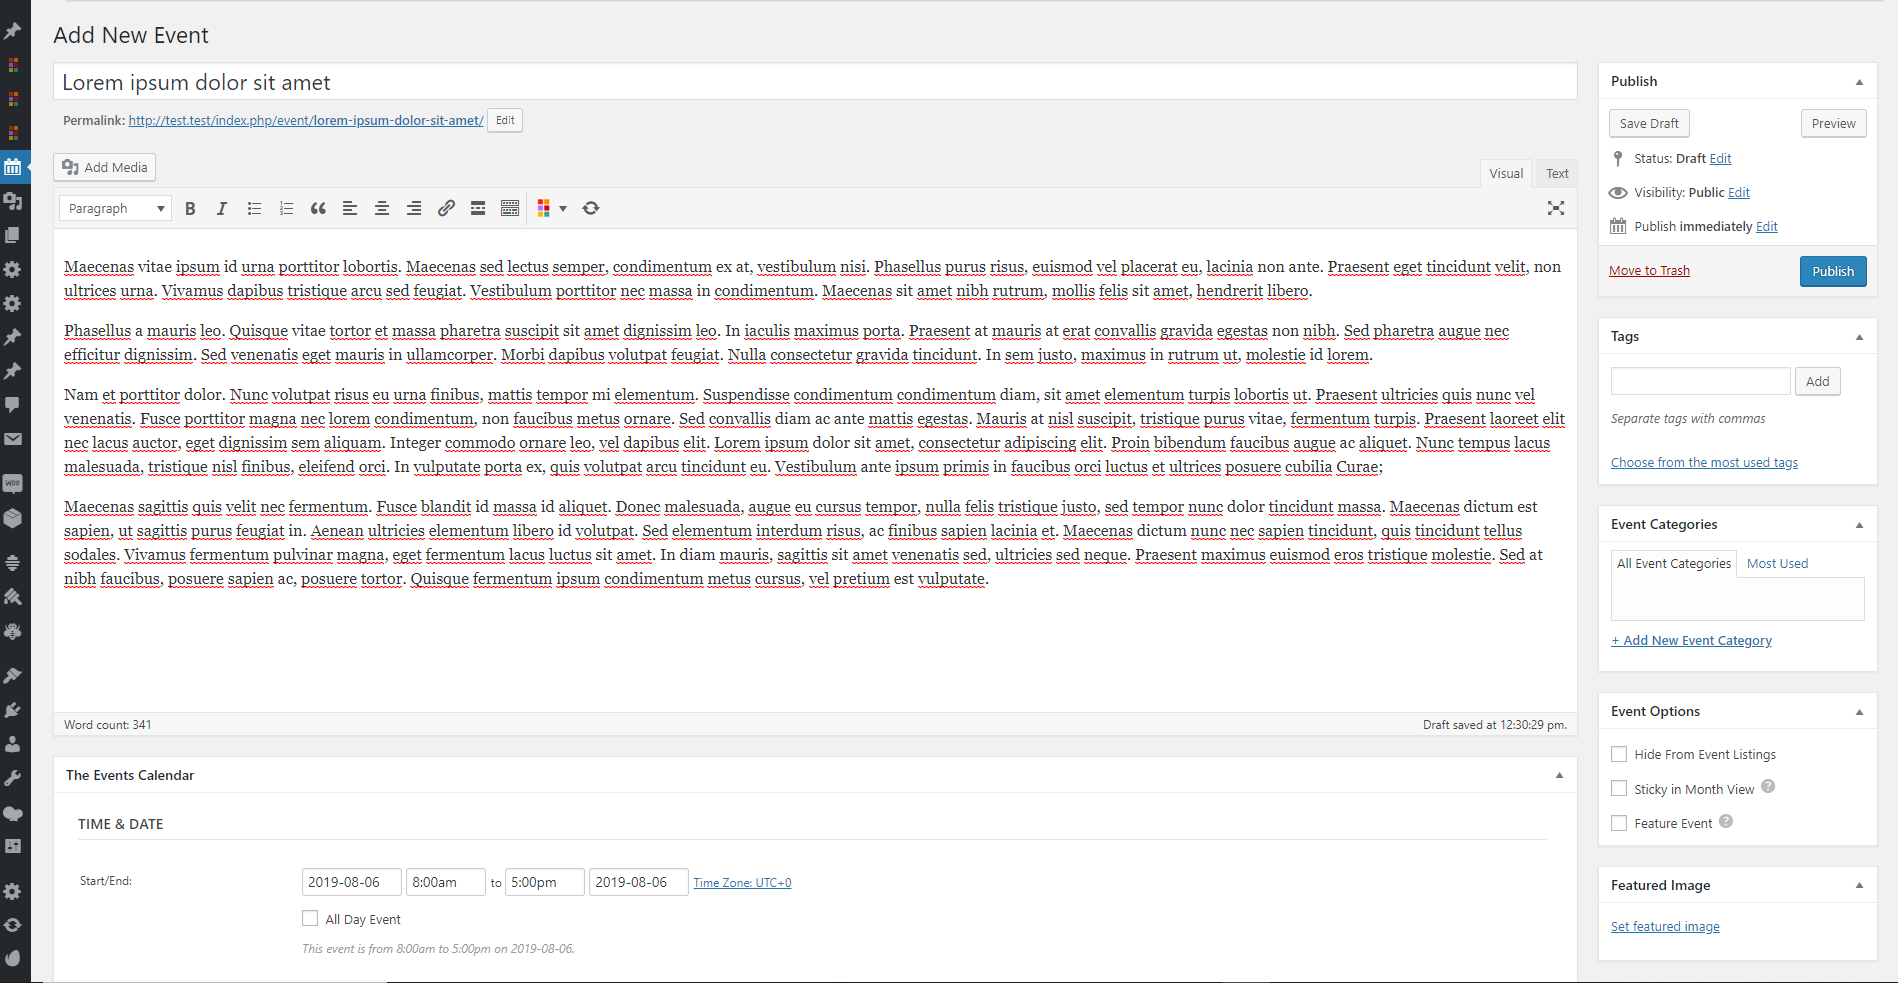
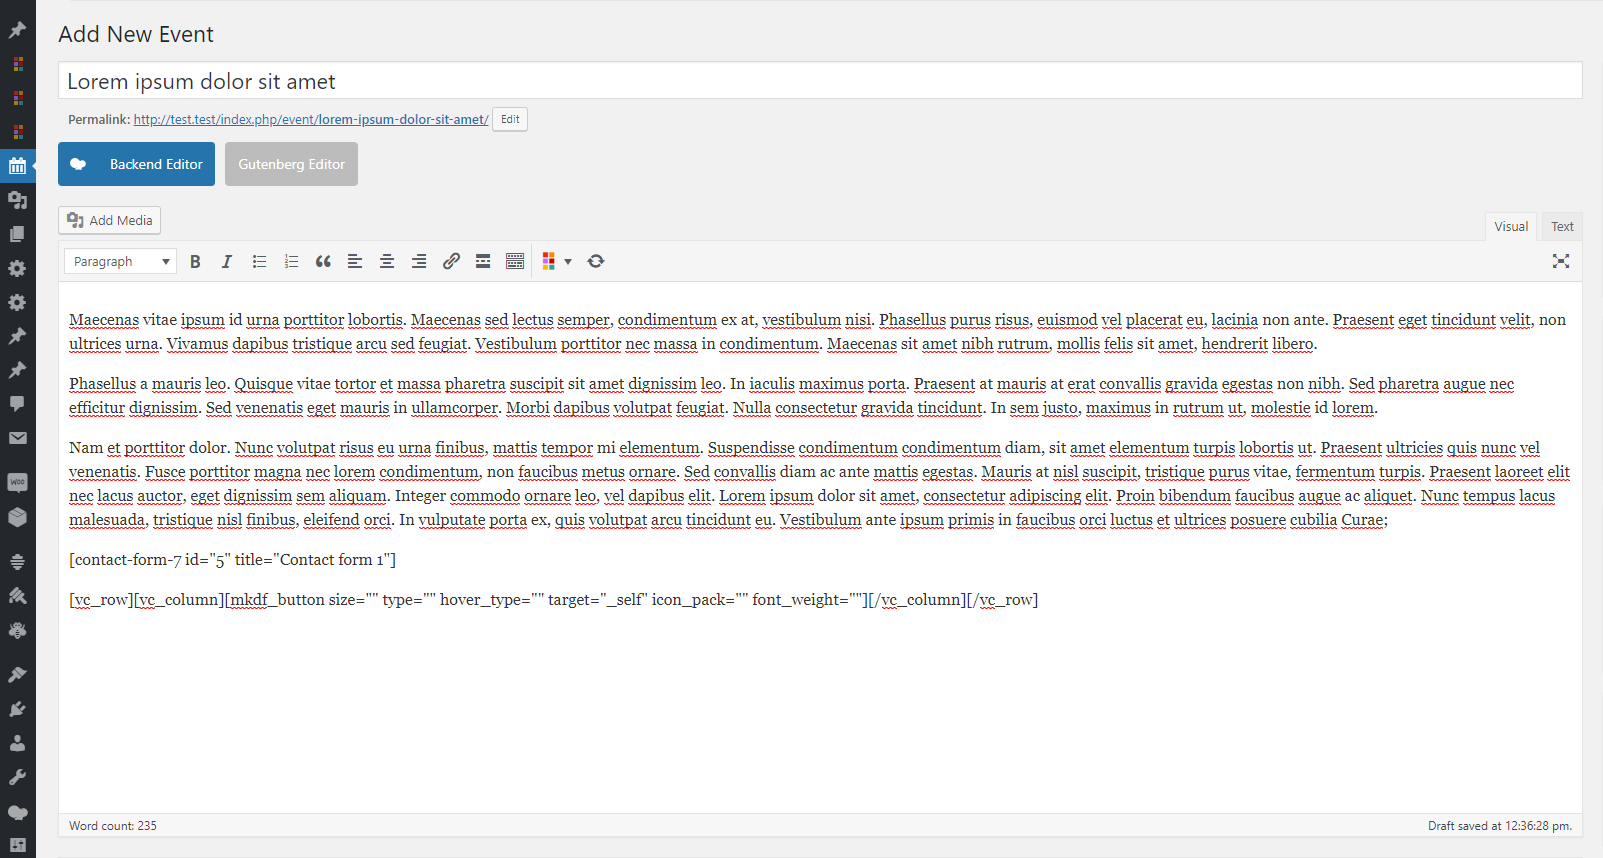
The event editor is nearly identical to the common page or post editor that WordPress uses.
Similarly to what you’ll find on a page or a post, you can add a title and description to your event. The standard options for saving it as a draft or publishing it are present as well:
Seeing that with our themes you get the WPBakery Page Builder bundled, you’ll also have the option to edit the events using this plugin. In order to enable using the WPBakery for all the custom post types available, you’ll need to scroll down to WPBakery in your dashboard, click the Role Manager option and select Custom from the dropdown. Now simply tick the boxes next to all custom post types displayed, and you’re good to go:
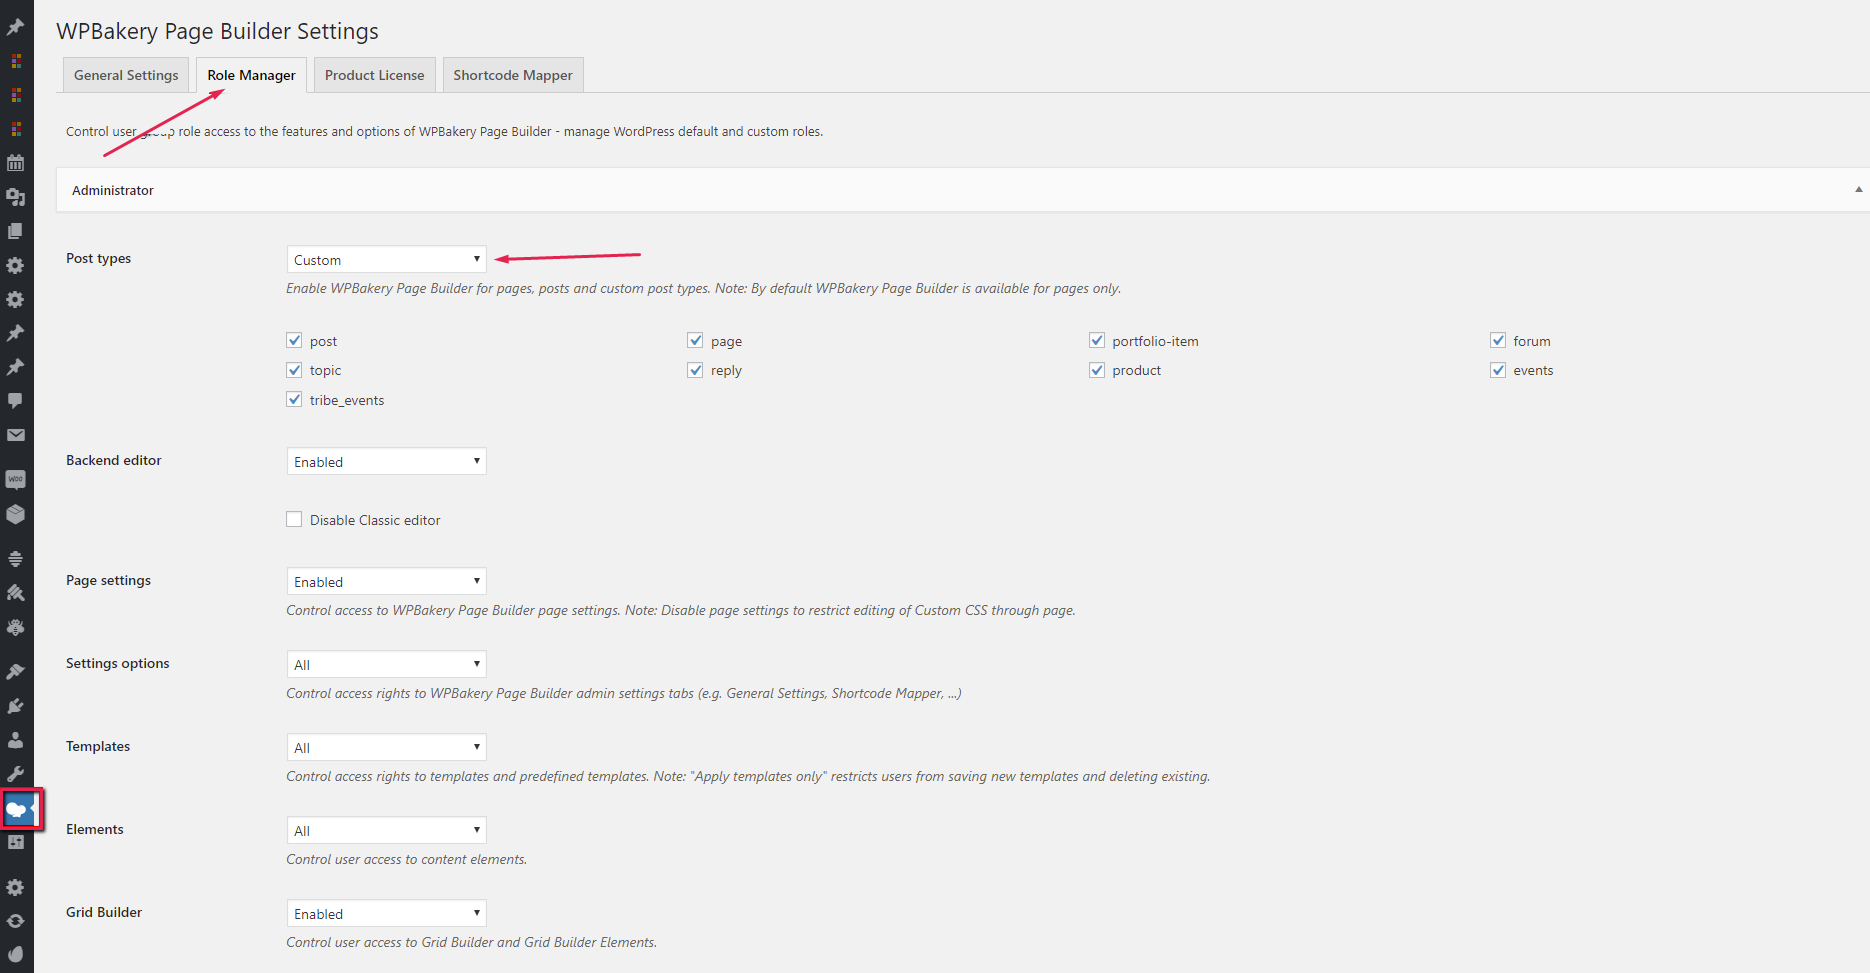
This will enable the WPBakery Page Builder on Event pages as well.
Event Time
Events have specific types of information which most pages and posts do not have connected to them – e.g. the start and end date, the event location and event organizers.
The options for setting these up can be found below the editor in the event options:
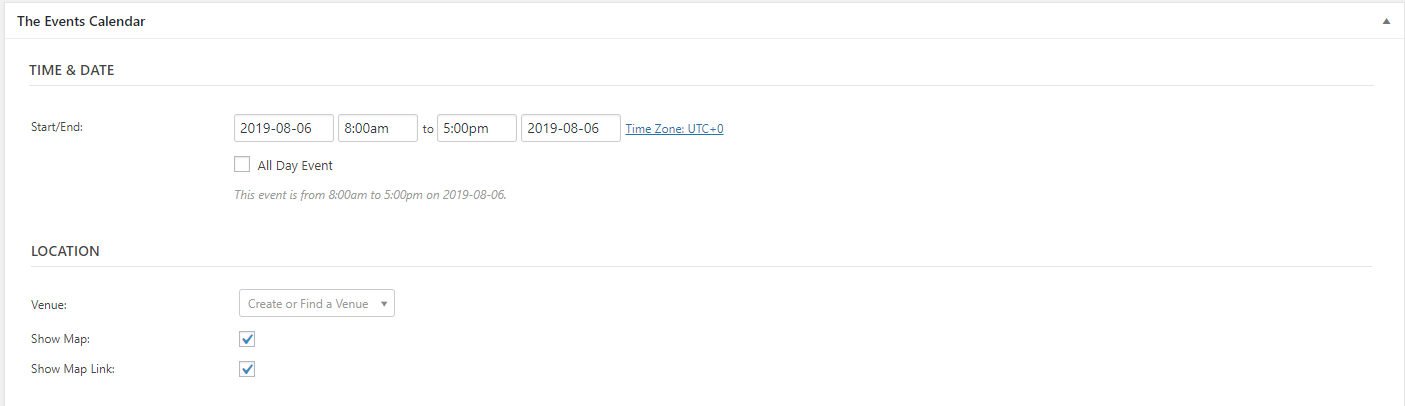
First off you should set the date and time for the event.
Start/End – This field simply represents the date and time when the event begins, and the date and time it ends. By clicking on one of the date fields you’ll get a date picking tool where you can choose the dates from a calendar layout. You can also add these manually.
If you have already marked the All Day Event checkbox, you won’t be able to define the time for the event.
The All Day Event option is useful when an event takes place on a specific date (or several dates) – but for whatever reason you could be unsure of the definite date, or perhaps you believe that stating the fact it’s an all-day event says enough about the said event.
Event Venue
This option lets you input the information about where the event takes place, as well as to show the map of the event location on a page.
It’s important to stress that you need to input a Google Maps API key into the theme options in order for the map functionality to work. You can learn more about creating Google Maps API keys here.
In case you do not wish to define the event location, you can skip right over to the next option.
Organizers
Much like the event venue, providing information about the event organizers is optional.

If wish to skip this field, you can do so. On the other side, there’s also an option to add multiple event organizers.
Event Website
This is another optional field you can fill in, and here you can add the website for the event.

This is particularly useful if you’re featuring an event created by an outside generation which has a dedicated website.
Event Cost

This is another optional field – if you leave this field empty, no cost will be displayed. However if the event is free, you should input 0 in this field.
Also, keep in mind you can add the currency symbol of your choosing to the digit.
It’s important to note that if you wish to charge for the event on your website, you should install an extension for selling tickets, or a 3rd party plugin so your transaction system could work.

Finally, once you’re done with setting your event up, you should click the Publish button in order to save and publish the created event.
In order to display your events on a page, you should adjust the event settings – navigate to Events > Settings:
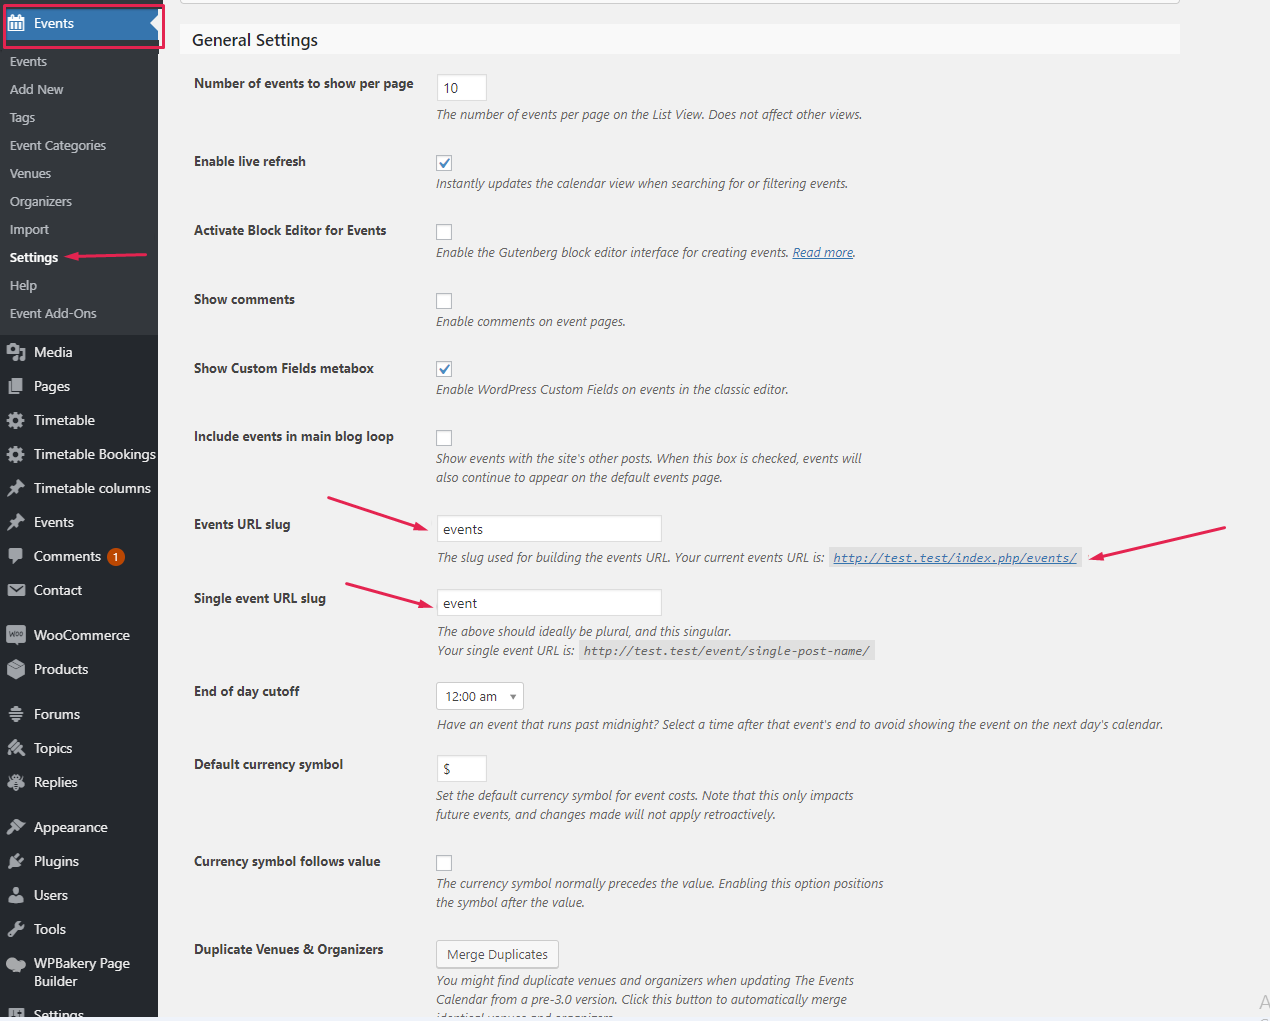
After that, the page https://your-web-site/events/ will display a calendar with all the events you’ve previously created.